
Foreword
This guide was developed with the generous support and expertise of SubtleShader. SubtleShader's contributions were foundational, particularly in the areas of photography, merging, precision, and overall workflow rigor. His input helped shape the structure, clarity, and quality standards throughout the guide.
Note: If you run into challenges while training your character LoRA, feel free to reach out. I design professional-grade LoRAs and may be able to support your process.
Chapter 1: Introduction
Creating a highly realistic, high-fidelity character LoRA is a precise and professional undertaking. It requires a deliberate design methodology, technical discipline, and a comprehensive understanding of how visual data translates into semantic features within an AI model. This process can be compared to architectural design: the more intentional and refined your approach, the more stable and adaptable your final model will be.
This guide is intended for creators who require their model to perform consistently across a wide range of prompts, lighting conditions, facial expressions, and camera angles. Whether the objective is branding, marketing, storytelling, or personal use, the goal remains the same: to produce a character model that is photorealistic, promptable, and robust.
This guide is not designed to be:
A one-click training shortcut that eliminates the need for thoughtful input
A low-cost outsourcing solution that compromises quality for convenience
A photography tutorial, although a solid understanding of photography will significantly improve results
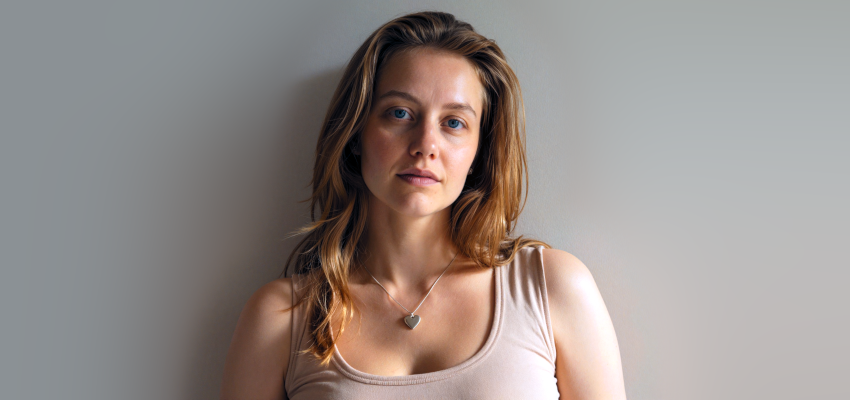
Below is an example of a generated image using the method described in this guide.

Vision Before Execution
Before collecting data or setting up a training run, define your intent clearly and in writing. Consider the types of scenes your character should inhabit, the emotions it should express, and the relevant camera angles, lenses, and moods. Determine how lighting and background elements will be handled. These design decisions will guide both the data collection and the training and validation processes.
The recommended base model for developing a high-quality and realistic character LoRA is Z-Image Turbo, which offers strong anatomical accuracy and photorealistic texture handling. However, no base model is without limitations. Study its strengths and weaknesses carefully. Your LoRA must extend and refine what the base model does not already understand.
Ethical Foundation
If the model is based on a real individual, written consent is mandatory. This consent must include permission to use their images, to train the model, and to generate content using their likeness.
Legal compliance is essential. Be aware of applicable privacy laws, copyright regulations, and personality rights. Ethical responsibility goes beyond legal requirements. Realistic AI-generated content can be misused, and creators must act with care, particularly when working with identifiable individuals.
Also clarify who holds the rights to the trained model and its outputs. Define whether the creator, the subject, or both retain usage rights. This helps avoid confusion, especially in commercial or collaborative contexts.
Always consider the intent and potential impact of your model. If there is any uncertainty regarding the appropriateness of its use, seek professional advice.
Prerequisites
To follow this guide effectively, you should possess a strong visual and analytical sensibility. A background in photography is beneficial, as is working knowledge of tools such as ComfyUI, GIMP, and Photoshop. A modern Nvidia GPU with at least 16 GB of VRAM is recommended to ensure smooth training performance.
Note: If local hardware is unavailable, cloud services such as Runpod or Google Colab can be used. These offer access to high-performance GPUs but may introduce limitations in session duration, storage, and reproducibility. Use with care and ensure compatibility with your process.
This guide is not simply about executing a training script. It is about constructing a system that can visually and semantically interpret your character. This includes designing a dataset that communicates identity clearly, captioning with semantic precision, training with control rather than automation, and validating results through visual inspection rather than relying solely on metrics. Prompt structure must also be considered during deployment to ensure consistent output.
Each chapter in this guide represents a step in this process. Expect to revise, refine, and iterate. The workflow is intentionally slow to maximize quality, fidelity, and control.
Chapter 2: Dataset Construction
The dataset is the most critical component of the model training pipeline. It is not merely a collection of images and captions. It defines the visual identity, semantic boundaries, and behavioral patterns that the model will learn to replicate.
Image Selection
Images must be selected with care, based on clarity, diversity, and relevance. Each image should contribute a distinct element to the dataset, such as a specific pose, facial expression, lighting condition, or composition. Redundancy should be avoided, as repeated visuals introduce bias and reduce the model's ability to generalize. If the dataset is large, tools such as FastDup can assist in identifying and thus removing duplicates or near-duplicates.
Variation is essential. A curated dataset of 150 to 200 images is typically sufficient to produce a high-quality model, provided that each image is purposeful and distinct. This target is achievable through careful selection and editing, and it should reflect the intended capabilities of the model. But remember, quality over quantity works best in image selection.
Note: Images of the same person taken too far apart in time can introduce inconsistencies, as changes in age, style, or appearance may affect how features are interpreted and captioned.
A recommended distribution of image types, based on camera framing, is as follows:
Close-ups: 20–30%
Mid shots: 40–50%
Full body: 20–30%
This balance enables the model to learn facial detail, body geometry, and spatial context. Any deviation from this structure should be intentional and aligned with the specific objectives of the character model.
Image Quality and Composition
Use high-resolution images in PNG format whenever possible. If JPEGs are used, they must be saved at maximum quality to avoid compression artefacts, color shifts, and banding. Lighting should be soft and directional. Avoid harsh shadows, blown highlights, and inconsistent exposure, as these degrade training quality.
Backgrounds should either vary, be neutral, or be removed entirely. Distracting elements introduce noise, reduce model focus, and can accelerate overtraining. Use background removal tools such as BRIA RMBG-2.0 or Photoroom and apply manual corrections where necessary. After removal, fill the transparent regions with a random soft color using a random hue with fifty percent saturation and fifty percent value so that the model does not learn or repeat a consistent background.
Skin tone must be consistent across the dataset. Correct blemishes, uneven lighting, and color imbalance. Retouching should aim for clarity and uniformity, not stylization.
Pose, Expression, and Body Geometry
Every decision in dataset construction should reflect the intended use of the model. Before selecting images, ask: What should this character be able to do? The answer will guide the selection of poses, expressions, and visual contexts.
Use natural, anatomically accurate poses such as standing, sitting, leaning, or walking. Avoid ambiguous limb placement or cropped body parts, as these can confuse the model and reduce promptability.
Include a range of facial expressions, such as neutral, smiling, serious, and playful. This supports semantic variation and enables the model to respond accurately to prompt-based emotional cues.
The objective is to build a model that understands the character both visually and semantically. Every image should contribute meaningfully to that understanding.
If object use is part of the character's intended behavior, include a few clear examples, such as holding a cup or using a phone. These should be natural, well-composed, and relevant to the model's purpose.
About Phone Cameras
Images from phone cameras should only be used when no better source is available, and only after thorough post-processing. These images often suffer from perspective distortion, compression artefacts, color imbalance, low dynamic range, and inconsistent exposure. The skill of the photographer also affects the final quality.
If phone images are included, they must be edited to meet the visual standards expected by the base model. This includes correcting technical flaws and unifying the overall look and feel of the dataset. Experience in post-processing is essential. While captioning poor-quality images may offer limited mitigation, it is not a reliable solution and should be avoided, as it can introduce artefacts into the generated outputs.
In summary, unless you are confident in your ability to correct and standardize phone images, it is best not to use them. If phone images must be used, tools like the Enhanced Image Colour Transfer node from ImageBag (https://github.com/NHLStenden/ComfyUI-ImageBag) can help align colors with higher-quality sources, assuming careful preprocessing.
Chapter 3: Tagging Strategy
Tagging is a foundational step in the training pipeline. It is not optional, nor is it cosmetic. Captions form the semantic structure of your dataset. They determine how the model interprets visual features and how those features can be prompted during generation. Even with high-quality images, poor or inconsistent captions introduce noise and significantly reduce control.
Structured description enables precision. It allows the model to associate specific visual traits, such as clothing, expressions, or environments, with promptable concepts. This is essential for building a model that responds reliably to descriptive input.
Always describe with intent. Each caption should reflect what you want the model to understand and reproduce.
Purpose of Tagging
Captions serve two essential functions:
Descriptive: Accurately reflect the visual content of the image
Functional: Enable promptability during generation (pose, lighting, emotion, etc.)
Each statement is a signal. If your dataset lacks precision, the model will learn ambiguity. If your descriptions are rich, consistent, and relevant, the model will learn structure.
What to Describe and Why
Describe only what is meaningful. Avoid generic or redundant details such as naming individual body parts (for example "nose") or stating that a subject is alone ("solo"). Focus on features that define the character and influence generation. To help guide consistent and effective captioning, here is a breakdown of meaningful categories and examples expressed as natural language concepts:
Pose: standing, sitting, reclining, leaning
Expression: smiling, serious, surprised, angry
Lighting: soft light, backlight, highkey, lowkey
Background: studio, outdoor, gradient, textured wall
Clothing/Accessories: dress, scarf, hat, high heels, glasses
Hair/Makeup: long hair, updo, natural makeup, bold lips
Composition: centered, rule of thirds, diagonal, close-up
Facial Features: freckles, strong jawline, high cheekbones, asymmetrical eyes
Object interaction: holding cup, using phone, carrying bag
Describe interactions with objects only when they are visually clear and relevant. Avoid describing incidental or ambiguous objects. The goal is to support promptable behaviors that are intentional and consistent.
Caption Format
Use a structured, natural language format for each image. This improves consistency and supports predictable prompting.
A recommended format is a concise sentence or two that introduces the subject, then describes pose, expression, lighting, clothing, background, and composition in a readable order.
Example:
Woman stands and smiles under soft frontal light, wearing a red dress in a studio setting. The subject is centered in the frame.This structure promotes semantic clarity and prompt compatibility without relying on comma-separated tag lists.
Tools and Workflow
Auto-captioning tools can provide a starting point, but manual correction is essential. Automated systems often produce vague, subjective, or redundant descriptions that do not contribute meaningfully to training. You are responsible for the quality of the model, and that responsibility includes the captioning process.
Recommended workflow:
Generate initial captions automatically
Review and rewrite each caption in natural language
Remove irrelevant or repetitive information
Prioritize descriptors that influence generation
Maintain consistency across similar images
Chapter 4: Training
Training a realistic character LoRA is a gradual process. It benefits from controlled overfitting, steady improvement, and continuous evaluation. The goal is not to train until failure, but to reach a point where identity, structure, and promptability are reliably captured without collapsing into repetition or distortion.
Training Configuration
Begin by installing and configuring AI Toolkit locally or on a GPU cloud service such as Runpod. Follow the official documentation for setup and hardware requirements.
Create a dataset within AI Toolkit, name it clearly, and upload the curated images and captions. Once complete, create a new training job and select this dataset as the source.
Select the base model (Z-Image Turbo) and configure the core settings:
Linear Rank: 64
Training Steps: 10000
Resolution: Default (256, 512, 1024)
Checkpoint History: 8 (adjust based on storage)
Add at least three sample prompts taken from the dataset to generate preview images during training. These samples provide reference points for monitoring progress and identifying early signs of overfitting or drift. After reviewing the configuration, create the job and start training.
Monitoring Progress
As training progresses, preview images will be generated periodically. Inspect these visually, focusing on identity consistency, anatomy, texture quality, and prompt responsiveness. Signs of overfitting may include repeated poses, exaggerated detail, or reduced variation. Early-stage instability is normal; mid-run outputs often represent the best balance between fidelity and flexibility.
Training does not need to run to completion if quality deteriorates too much. If a checkpoint appears stronger than later outputs, note it for evaluation rather than continuing blindly to the end.
Exporting Results
When training is finished, export all stored LoRA checkpoints in .safetensors format. Retain multiple candidates for evaluation, along with optional configuration notes and/or dataset version details. These will be tested and compared in the next phase to determine which checkpoint performs best in practice.
Chapter 5: Validation and Checkpoint Selection
Validation is the process of determining which checkpoint best represents the intended character while maintaining promptability and generalization. It is separate from training and should be approached as a structured evaluation step rather than a continuation of training activity.
Monitoring via Sample Previews
During training, AI Toolkit produces periodic preview images from the sample prompts defined in the training configuration. These previews serve as the primary reference for checkpoint selection. Use fixed prompts and seeds so that outputs from different checkpoints can be compared fairly.
Selecting a Checkpoint
To select the most suitable checkpoint, review the stored previews across the training timeline:
Identify checkpoints that capture the character's identity clearly
Avoid versions where anatomy, lighting, or texture degrade
Prefer checkpoints that maintain responsiveness to varied prompts
Do not assume the final checkpoint is best; improvement often peaks before the end
A strong candidate usually represents a balance between detail and flexibility rather than maximum sharpness or aggressiveness.
Inference Testing
Once one or two promising checkpoints have been identified, load them into your inference environment (for example via ComfyUI) and test them with a small set of structured prompts:
Use prompts familiar from training to verify identity retention
Introduce a few unseen prompts to assess generalization
Evaluation should be based on consistent seeds so that results are comparable and deviations are attributable to model differences, not randomness.
Note: ComfyUI does have a great sampler and scheduler pair to test with. It is recommended to use ComfyUI-EulerDiscreteScheduler (https://github.com/erosDiffusion/ComfyUI-EulerDiscreteScheduler).
Evaluation Criteria
Focus on a succinct set of visual criteria when reviewing outputs:
Identity fidelity
Anatomical coherence
Texture and lighting quality
Responsiveness to descriptive prompts
You are not seeking perfection in every scenario, but predictable and reliable performance under typical use cases.
Iteration and Refinement
If none of the evaluated checkpoints meet your standards, note the shortcomings and return to training with modest adjustments. Because LoRA training is comparatively fast and lightweight, iterative refinement is often practical and expected.
Chapter 6: Iterative Refinement
Selecting a strong checkpoint does not guarantee that the model fully meets its intended purpose. Character LoRA development is often iterative, requiring occasional adjustments to the dataset, captions, or training configuration based on observed results.
Refinement begins with identifying specific shortcomings in generated outputs, such as limited emotional range, inconsistent anatomy, or unstable lighting. Address these issues by adding or removing images, correcting captions, or adjusting training duration. Changes should be goal-driven rather than routine.
Maintain a simple reference set of prompts and seeds so that results from different versions remain directly comparable. This allows you to assess whether changes have improved fidelity, range, or responsiveness without relying on memory or subjective impressions.
If multiple versions are produced, a brief scoring overview can help track differences:
A: HighModerate, Minor artefacts
B: GoodHigh, Slight softness
If others use the LoRA, collect feedback that focuses on usability and accuracy. Practical insights often reveal issues not visible in controlled testing.
The aim of iterative refinement is not continuous rework, but targeted improvement. Make adjustments only when clear gaps are identified and stop once the model performs reliably in its intended context.
Chapter 7: Deployment
Once the optimal checkpoint has been selected and exported, the final phase is preparing the LoRA for consistent use and long-term maintainability. Deployment is less about technical integration and more about preserving context, expectations, and repeatability so that the model behaves predictably whenever and wherever it is used.
Documentation
Alongside the LoRA file, include a short record summarizing:
Base model name and version
Dataset characteristics and any preprocessing applied
Training parameters that materially influence behavior (rank, steps, resolution)
Recommended inference settings (LoRA scale, resolution, sampler, etc.)
Known strengths, limitations, or edge cases
This information ensures that behavior can be reproduced accurately and understood without needing to reconstruct assumptions from memory.
Packaging
Package the following items together in an organized folder or archive:
The LoRA file in .safetensors format
A short readme containing the documentation listed above
A few example prompts and seeds that produce consistent, predictable results
Any usage rights or consent statements if applicable
This package should be self-contained, requiring no additional explanation for someone familiar with the base model and tooling.
A well-documented LoRA is easier to evaluate, share, and build upon, turning a training experiment into a reliable, repeatable asset.