Intro
So, I've been doubting if I should share this or not, because it is not a mechanical, surefire process since it involves trial, error and honestly, most of the time it is not worth the trouble.
This method is intended for individuals who are particular about achieving a specific outcome that cannot be attained through the prompt alone.
But, since some people are curious about it and I don't want to treat it as some super secret kung fu or anything, here we go.
Model Warning
BUT before starting, I want to mention that when working with artists, regardless of whether you are using Lora or just tags for your artist, I would recommend using models that don't wash artists too much. Illustrious in general tends to wash artists a lot; a model like NoobAI will probably work better for styles and is compatible with Illustrious LORA for the most part. Or maybe some sort of merge.
For these samples, though, I decided to use WAI-Illustrious because it is the most popular illustrious model, and I don't want to start by having people scratching their heads at my artist gens looking so different.
UI Warning
This tutorial is for Forge, ReForge, and all the variants. Conceptually speaking, it is valid for ComfyUI as well, but I do not use ComfyUI, so I don't have workflows tailored for this process.
With that taken out of the way, let's begin with this.
Target

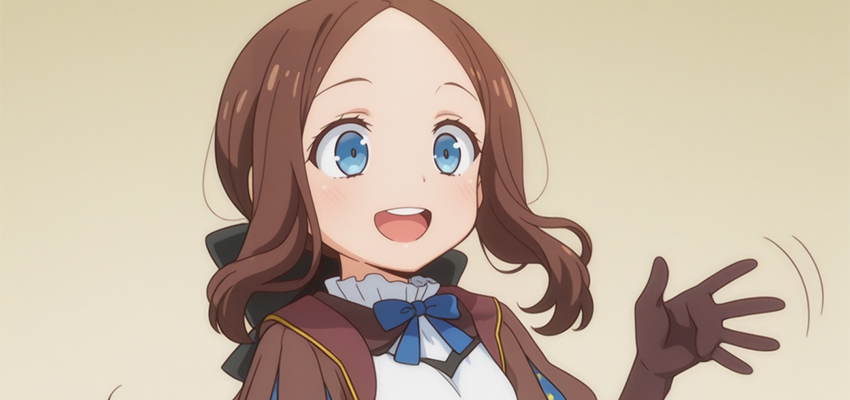
Maybe sometimes you have desired to make your favorite artist, but you want the coloring to be more like an anime. As if it were some sort of an anime adaptation.
For those cases you start by using tags like "anime coloring," "anime screencap," and "anime screenshot."
But sometimes the artist is too strong, and no matter how hard you try, you can't get rid of the artist's coloring.
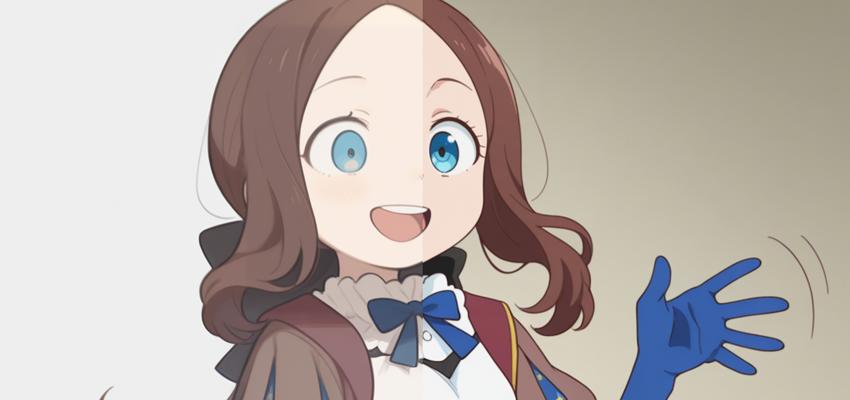
anime coloring, anime screencap, anime screnshot, kinni, 1girl, solo, blue eyes, long hair, brown hair, forehead, low ponytail, ribbon, dress, white shirt, puffy sleeves, short sleeves, red skirt, cape, blue pantyhose, elbow gloves, waving, smile, upper teeth only <lora:vinci_illus:1> <lora:kinni:1>
As you can see, even with the entire anime collection tags, it doesn't look very much anime-ish.
Well, there is a way around to keep the artist's style (to a degree; obviously there is going to be some washing) while changing the coloring entirely.
So, like a good anime adaptation, we are going to destroy the original artist's style in exchange for flat colors.
How much you will retain from the original artist will depend on the artist and your choices.
Step by Step Process
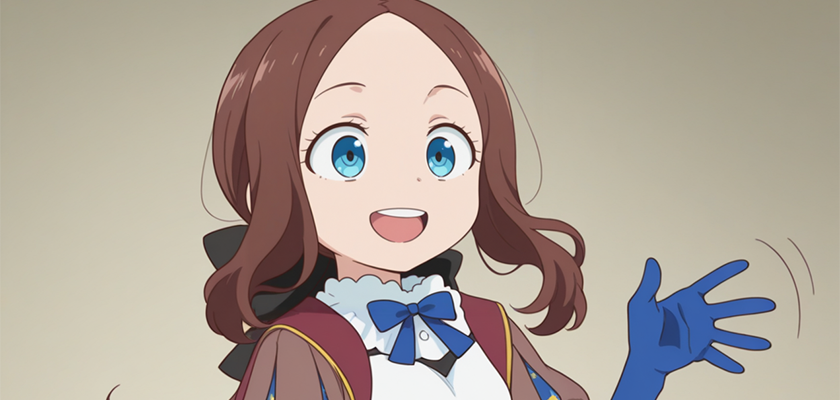
First you should start by generating your image with the Lora or artist tags. The only relevant part here is that you use the artist tag or Lora (with its corresponding activation if it has one) and do NOT include any anime style tags.
In this case:
kinni, 1girl, solo, blue eyes, long hair, brown hair, forehead, low ponytail, ribbon, dress, white shirt, puffy sleeves, short sleeves, red skirt, cape, blue pantyhose, elbow gloves, waving, smile, upper teeth only <lora:vinci_illus:1><lora:kinni:1>
The second step is activating ControlNet and selecting the picture you just created.
You will also need a lineart model, I use this one: kataragi/ControlNet-LineartXL · Hugging Face
In Forge (ReForge, A111, etc.), you are supposed to copy them to the models/controlnet folder.
Now, once you have that, just select the picture and select "lineart." On the menu select "lineart anime," select the model, and activate it.

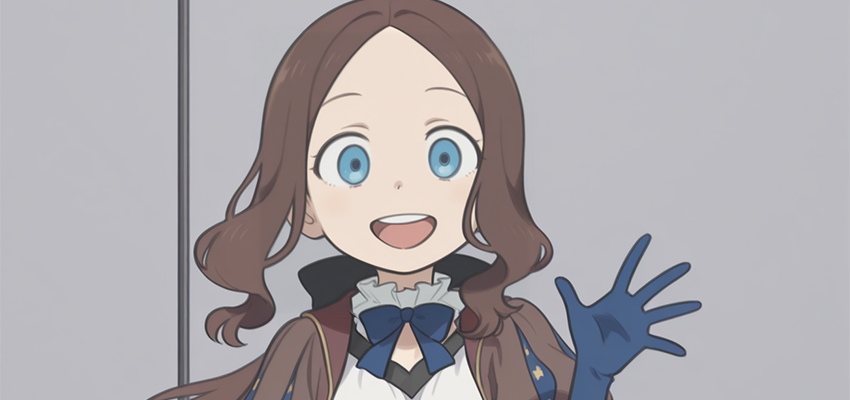
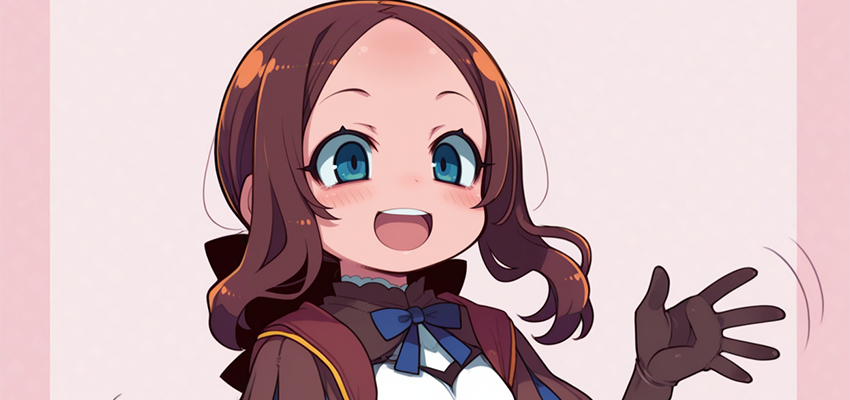
Now, all you have to do is change the prompt and DELETE the artist tag, the artist LORA, and the activation tag if there was one.
Repeat the exact same prompt but add anime tags. In this case:
anime coloring, anime screencap, anime screenshot, 1girl, solo, blue eyes, long hair, brown hair, forehead, low ponytail, ribbon, dress, white shirt, puffy sleeves, short sleeves, red skirt, cape, blue pantyhose, elbow gloves, waving, smile, upper teeth only <lora:vinci_illus:1>
And generate the image:
That's pretty much the whole process.
If you are not satisfied with the results, you can always try a different seed, which will give you different results but about the same tone.
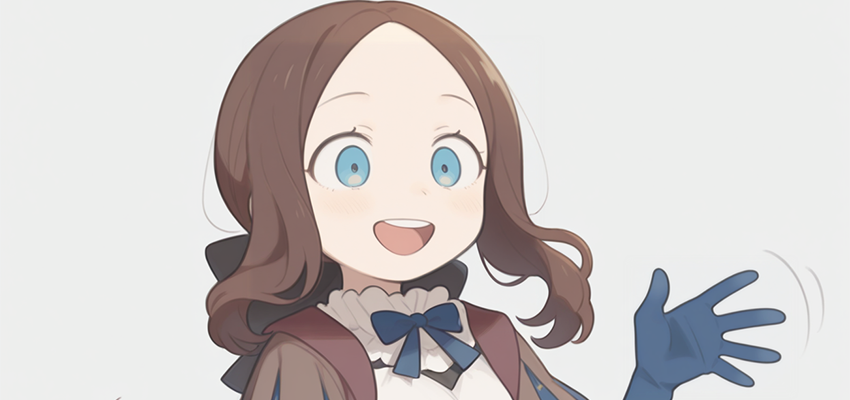
Now, there is another option; it's the same method, but instead of "lineart anime," you pick "invert."

What this option will do is respect more the original shading, so it will give you something more akin to an "anime illustration" than a "screenshot" vibe. Most of the time this will sacrifice even more artist likeness in the line art but won't look as "blurry" as the other option.
Which option looks better will depend on both your tastes and the artist in question.

If you are not satisfied with either, you can take it one step beyond and combine either of these modes plus add a Lora with a strong anime style. This will, however, wash out even more of your artist of choice, so use with care.
anime coloring, anime screencap, anime screenshot, 1girl, solo, blue eyes, long hair, brown hair, forehead, low ponytail, ribbon, dress, white shirt, puffy sleeves, short sleeves, red skirt, cape, blue pantyhose, elbow gloves, waving, smile, upper teeth only <lora:vinci_illus:1> <lora:Pink_pineapple_2014-ish_style_rance01_anime_screencap_IL:1>

Advantages
So... is it worth it?
It depends. This is probably quite niche and nitpicky but can be useful for several things:
+Making more anime-ish versions of artist images with a coloring that is not anime at all.
+Making more anime-ish versions of images you don't manage to pull out flat colors no matter how hard you try.
+Combining artists, for example, if you like one artist's shapes but another artist's coloring, you can mix both.
For example, I like Zankuro's coloring, but I'm not a fan of the body shapes. So instead of trying to modify the body shapes of Zankuro's artist trying to make the characters more slender or adding in a mix of artists trying to modify the body shapes, I can directly gen with another artist and then color that image with the "zankuro" tag on it.
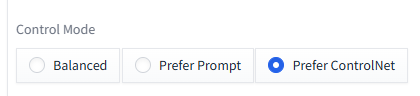
While doing this task, activate the "Prefer Controlnet" is usually better.
zankuro, 1girl, solo, blue eyes, long hair, brown hair, forehead, low ponytail, ribbon, dress, white shirt, puffy sleeves, short sleeves, red skirt, cape, blue pantyhose, elbow gloves, waving, smile, upper teeth only <lora:vinci_illus:1>
+I should probably have started by saying this, but I forgot because I assumed it was kind of obvious. But I realize some people may not know that. This is also the method you use to color monochrome images such as manga panels.
For this task in particular, "invert" mode is highly recommended.
1boy, anime screencap, anime screenshot, anime coloring, itadori yuuji, hoodie, pants, jumping, red hair, undercut

Disadvantages.
-It can wash away the original artist's style if you are not careful. Thus, my recommendation is to use models friendly with artists.
-For this tutorial I kept the same seed for educational purposes. As you can see, that makes the pieces of clothing change with the changes in the prompt; for example, the gloves turn brown.
I left that on purpose because I don't want to give people false expectations.
That can be easily fixed by either adjusting the prompt to make it more fireproof OR simply by changing the seed. Actually, it is highly probable you will need to test a few seeds.
IMAGES:
Here you have all the images in all its glory for reference.
https://civitai-proxy.pages.dev/posts/25405256
